Monday, 24 November 2014

Mini Monday - Ribbon and Ring Binding


Hello everyone.  :)  We are moving on from covering your album to different forms of binding systems for your mini albums. There are a ton of different options out there.  We are going to go through a few of the ones that we use on a regular basis.

Today we are going to discuss Ribbon and Ring Binding. This is by far the easiest and quickest way to bind a mini album.  


Here are is an example of what a Ribbon Bound book looks like.


This is the outside of the album


This is the inside center of the album


This type of binding adds a little wow factor to the spine of your album and the ribbon lays flat on the inside of the album, making the pages turn nicely.


There are not a lot of tools you will need to create this binding.  Basically all you need is the following:


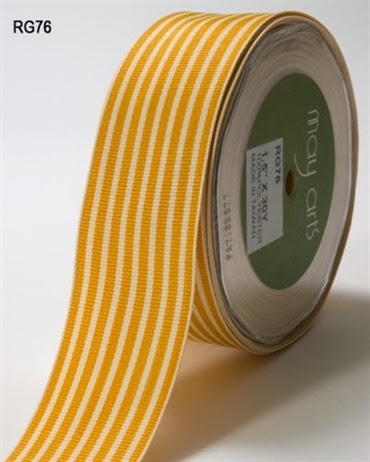
Ribbon of course
There is no shortage of this in my craft room.  LOL


The ribbons above are a nice size for this type of binding. They slide through the holes we are going to punch with ease.  This is not to say that you can't use a larger ribbon like the one below.  You will need to punch a larger hole in your pages and spine to allow for the extra bulk of this type of ribbon to thread easily.


A hole punching tool.  There are several different options out there.  We R Memory Keepers has a couple tools that are great for punching holes through heavy paper like chipboard.

This one is called a Crop-A-Dile.  This is a multi-purpose tool and can punch holes in two sizes and set eyelets. However it's reach is not very long.  What I mean by "reach" is you can only go in about an inch from the edge or your page.  


The Big Bite solves the reach issue and is also a multi-purpose tool (punches holes and sets eyelets).


These tools are nice to have but are another investment you would have to make.  They run anywhere from $30.00 to $50.00. 

We do have a less expensive alternative and you might already have one hanging around your house.  :)

Just a regular old hole punch will work fine.  You may have to put a little extra muscle behind it to get these stationary type products to go through thicker materials like chipboard but they will work.  Again the reach of this tool is not very big, only approximately 1 inch.


You can use 2 and 3 hole punches that you would find in a stationary store, but remember the space between the holes is fixed.  These may not work on all mini albums.


Lets move on to the actual binding.  First you will need to create your cover and your pages.  The cover can be one that has a spine or just two separate chipboard pieces.

Cover with a spine


Cover - Two separate pieces


Ribbon Binding 

The first holes we are going to punch are in our page assemblies.  You want the holes to be a least an inch from the top and bottom of your page assembly, if your holes are too close to the bottom of your page assembly you run the risk of having them tear.  One inch is the max space that most stationary hole punches and the cropadile will accommodate. You should have at least a 2 1/2 to 3 inch inch space between the holes, if your holes are too close together your mini album pages are going to flop around inside your cover.  

These dimensions are based on a 6 inch book.  If your book is larger the space between the holes should be larger or you can add extra holes to make sure everything is secure.

Now you can eyeball where you want the holes to go and this will work just fine.  But for those of you who are a little more like me...LOL...you can measure to find the placement of the holes.  You will only have to do this once.  

All you have to do is measure 1 inch from the top and bottom of your page assemblies and make your mark.


Then just punch the holes.


This is the Cropadile


This is a regular hole punch


Once you have this step done you can trace the holes from
your first page assembly onto the remaining ones.  To do this line up the pages and simply trace the holes and punch.


After you have all of your holes punched in your page assemblies stack them together and center them on the spine of the cover.  You are now going to trace the holes onto the spine.  Remove the pages and punch your holes. 


The amount of ribbon you will need will depend on how large your book is.  For a 6 inch book we us about 12 inches of ribbon.


Cut one end of your ribbon at an angle.  This will make it easier to thread the ribbon through the holes if you don't have a needle.


You can thread your ribbon through a needle, if you don't have a needle you can wrap the end of the ribbon through a bobby pin (one of the ladies in a class we held did this and it worked like a charm).  If you don't have either of these available, no worries they aren't going to make or break the project.

Thread the ribbon up through the bottom hole of the album cover.
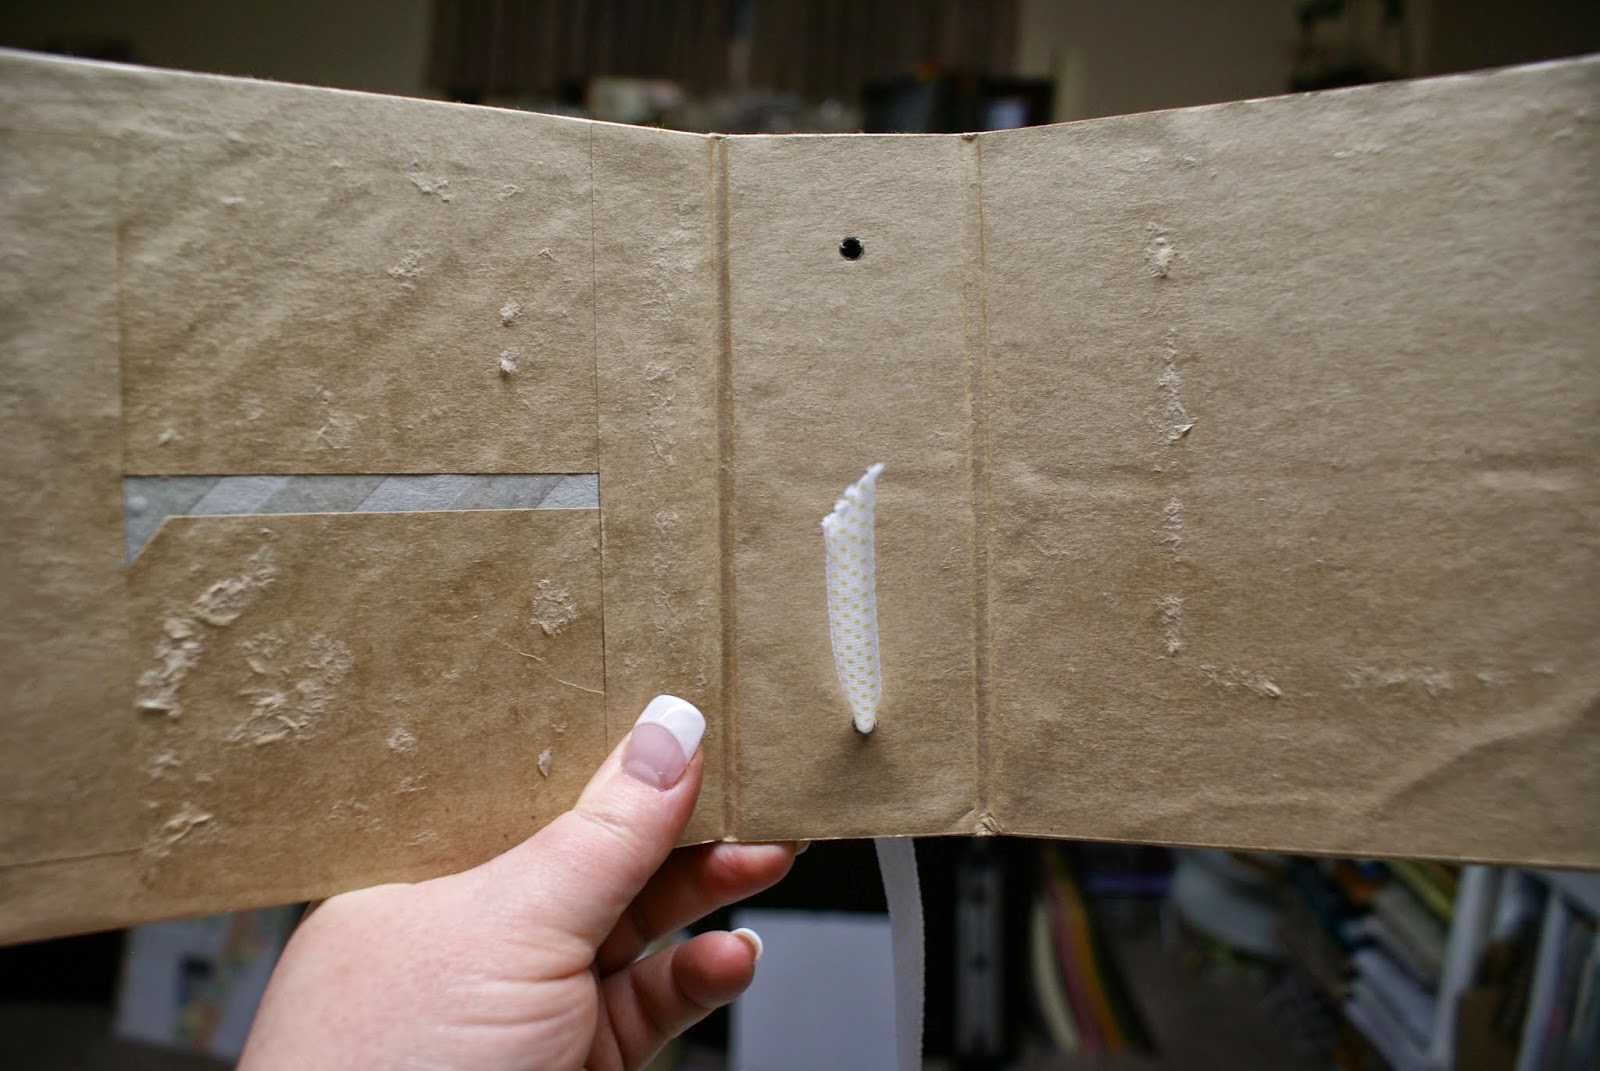


Thread the ribbon up through the bottom hole of all of the pages.


Thread the ribbon down through the top hole of all of the pages and the spine of the album cover.


Tie the ribbon in a bow or not on the outside of the album. Do not pull the ribbon too snuggly, your pages won't turn very nicely.


An you are done.  :)  You can tie a few extra ribbons to add a little extra wow...you could also tie some trinkets to the ends of the ribbons as well. 

I used 12 inches of ribbon in this tutorial so if you want to tie a bow I would use 18 inches of ribbon.  This will give you plenty of excess to tie the bow.  

Whew!!  This is turning into a lengthy blog post so I am going to split it into 2.  I will publish the Ring Binding system on Wednesday.  :)

Thanks for stopping by and remember we would love to hear from you.  Pop over to FaceBook and let us know what your favorite binding system is.


Monday, 17 November 2014

Mini Monday - Wrapping Covers Part 2


Hey everyone!  It is time for another Mini Monday.  We thought we would do one more day talking about covering album covers.   So today we are going to discuss how to cover shaped chipboard covers.

Today's technique is fairly simple.  There are only a few tools required.


Liquid glue or glue stick


Your favorite sanding tool.


a brayer.


And a good pair of scissors


The first step is to trace the shape of your chipboard album onto your patterned paper.  Below I am showing both sides of my double sided patterned paper.  The brown side of the paper is the side I want showing so I am going to trace my shape on the opposite side, or the pink side.


After you have traced the shape onto your patterned paper you are going to want to cut it out.  


Now add your adhesive to one side of your entire chipboard shape.  Make sure you get as close as possible to the edge of the shape.  This will ensure that your edges of your paper will seal to the edges of the chipboard.  

Using liquid glue or a glue stick will give you some wiggle room in the next step.


Now lay the paper shape you cutout on top of the chipboard. Try to match the sides up as close as possible.  Now you can slide the paper shape around until all the edges match.


Once you have everything matched up run your brayer across the shape a couple times.   If you don't have a brayer just run your hand across the paper a couple of times.  The reason for doing this is, to make sure there is a secure stick between the chipboard and paper.


Now that we have everything glued down.  Give it a minute to dry.  

Next take your sanding tool and sand all the edges of your piece.  This is going to help hide all the imperfect edges and help get rid of any excess paper.


After you have finished sanding all the edges of the piece you can add a coordinating ink to the edges.  This is an optional step but is one I usually do.  It helps hide and imperfections and adds a little extra wow factor to your mini. To apply the ink I usually use a finger dauber.  The application is very easy.  Simply dab your dauber into your ink and rub it across the edge of your piece.


Apply the ink to all the edges of the piece and to the edge of the chipboard.  


Once you have completed this step you are done one side of your cover.  Repeat all the steps for the other side.

That is it for today my scrappy peeps!!  :)  Next week we are going to start talking about different binding systems.

Happy Scrap'n!!


Monday, 10 November 2014

Mini Monday - Wrapping Covers Part 1


Today we are going talk about wrapping the cover of your mini album. When you have spent all that time to create a gorgeous mini album you want to make sure that the cover is just as gorgeous!  It is the first thing that people will notice when they see your mini; your chance to make a good first impression!!!! 

It can also be frustrating – to keep the corners looking neat and crisp is sooooooo important – but by using a few of the tips and tricks I have picked up along the way and a little practice you will get a crisp professional looking album cover.


Before you start it is important to determine the proper size for your cover. If your cover is too small the inside of your album will show, but if your cover is too big it will put extra stress on your binding system and spine.


 As a general rule of thumb I select the chipboard cover height ½” larger than the height of my largest finished album page and the cover width ¾” larger than the width of the largest finished page.


*** It is important to consider the height and width of your finished page including any tags that may extend from the edge of the page***

The height measurement for the chipboard ‘spine’ piece should always be the same as the height of the cover pieces.  To determine the width measurement for the chipboard piece for the spine of your album count the number of pages that your mini album will contain and add ½” for each page. So for example if your mini contains 4 completed pages, your spine piece should be 2” wide. Having said that this calculation is NOT written in stone! If your pages are heavily embellished or have multiple flaps and pockets you may need to add extra space to allow your mini to properly close once assembled. While this can sometimes involve some guesswork, you can place all of your completed, embellished, pages on your work surface on top of each other to form a stack .Place your finger lightly in the middle of the stack to hold the pages in place, assuring that they are now aligned the way they will be in the finished album.  Measure the height of the stack and add ¾”.


Once you have cut your chipboard arrange all three pieces on your work surface leaving approximately 1/8” space between each piece. Measure the width (distance from end to end). 


You will now use this width measurement, along with the height of your chipboard to determine the measurement for the cardstock or patterned paper you will use to wrap your cover in. Do this by adding 2” to both measurements. For example if your chipboard height is 6” and your width measurement is 10” your cardstock measurement should be 8” x 12”.


Please note that if your dimensions require larger than 12” of cardstock in either direction you will have to join 2 pieces of cardstock together using a thin strong adhesive such as Scor Tape.


The next step is one of the most important steps of the process. Apply adhesive all around the edges of all three pieces of chipboard. Repeat for both sides of the chipboard. Make sure that you are using a strong adhesive (I recommend Scor Tape), and that you apply the Scor Tape as close to the edge of your pieces as possible.


On one side of the chipboard pieces liberally apply adhesive to fill in the entire center.


Position all 3 pieces of chipboard on your piece of cardstock, centering both top to bottom and side to side, leaving a 1/8” gap between the pieces.


Without disturbing the outside pieces, lift the spine piece and remove the adhesive backing on the side of the chipboard that is covered completely with adhesive. Adhere down. Remove the adhesive backing from your remaining pieces and adhere using the spine piece as your guide.

Using your bone folder, gently rub your cardstock up along all edges of your chipboard.


Fold cardstock up and around the chipboard and continue to burnish well with your bone folder. It is important to assure that you have burnished all edges well, forming a nice crisp crease tight up against your chipboard.


Once you have all the cardstock folded onto the cover unfold the paper.  All 4 of the corners should look like the picture below.  A square should be folded into your paper.


You are now going to trim away the the square.  Cutting at a slight angle, but NOT right to the corner of the chipboard.  Leave about an 1/8" space from the corner of the chipboard to the edge of the cardstock. As pictured.


Apply Scor Tape to all the edges of the cardstock and chipboard.  This is an important step in keeping the paper secured to your chipboard.


Remove the backing of the Scor Tape from the edges of your chipboard and cardstock and use your bone folder to gently fold the cardstock back up and over the chipboard.  Securing it to the chipboard.  Use your bone folder to burnish well.


In the corners you will have a slight overhang of paper. You want to take your bone folder and gently fold that piece in before you folder over the side next to it.  This will ensure a nice tight corner.


Once you have all your cardstock attached to your cover take your bone folder and gently massage the cardstock into the gap between the spine and covers.


And finally using your bone folder rub all the outside edges of the album cover.  This will ensure a good stick and make the edges crisp and professional looking.


There are quiet a few steps in creating and wrapping mini album cover with a spine and binding system, but the outcome is definitely worth all the work.

There are few other ways to wrap the covers of your mini albums that we are going to cover in next Monday's post! See you then!

Thanks for dropping by!   If you have any suggestions on what you would like to see let us know...leave a comment here or on our FaceBook page

Happy Scrap'n


Kim


Monday, 3 November 2014

Mini Monday - Adhesives


Today we are going to talk about adhesives...OMG where do I start.  LOL  There are tons of adhesives out there...some are better than others.  

When creating mini albums you require a very strong adhesive.  There is a lot of pressure on the binding system and the cover itself, so making sure everything is secure is essential.  There is nothing worse than putting all the time and effort into a project and then it starts to fall apart.

The tape we recommend using is either Scor Tape (our favorite) or Red Line Wonder Tape.

Scor Tape comes in a variety of widths and the rolls are a whopping 27 yards which converts to 87 feet.   It is acid free, heat resistant and incredibly sticky.  

It also has a variety of other uses.  It can be used with embossing powders, foils, beads, glitter and ribbon.

In my opinion one of the biggest bonuses of Scor Tape is it has a paper backing so you can tear it with your fingers with ease.  No need for scissors.

Most scrapbooking stores carry it, and it is relatively inexpensive, considering the amount of tape that is on the roll.  If you are live in our neck of the woods you can find it at Scrappin With T in Moose Jaw.  There are also a ton of online stores that carry this product.


Redline Wonder Tape is a Ranger product and is another superior product.  It has all of the same wonderful properties as Scor Tape.  It sticks to just about anything and just about anything will stick to it.

The only down side of this tape is it has a plastic type backing so it has to be cut with scissors.

Redline Wonder Tape comes in 3 widths 1/8", 1/4" and 1/2".  If you require a bigger sheet it is also available in 8"x10" sheets.  The rolls are 15 feet long. Considerably less on a roll than Scor Tape.  It is also available a various online stores.


When building your pages and pockets we also recommend using one of the above mentioned products.

For all of our other scrapbooking needs we usually use a tape runner made by Untied Mfrs.  Kim and I got the dispenser from Teresa at Scrappin With T, and of course we get all our refills from her also.  I also have seen these for sale on Ebay.

The adhesive for these tape guns is amazing.  It is by far one of the best tape gun adhesives around.  It comes in 1/2" width and is (I am guessing here there was no length published) 36yards or 108 feet long.


I have also used the Scotch Pink Advanced Tape Glider.  This is another great tape gun.  The tape in these guns is 1/4" in width and is 36 yards or 108 feet long. 

I think most you will recognize this one.  :)  It is available at Michael's and at various online stores.


I am the liquid adhesive user of our duo.  I often use liquid adhesive when I am doing 12 x 12 scrapbook pages and when adding patterned paper to a constructed mini album.  I like that I have a little wiggle room when laying down the paper.  If I don't get it exactly straight I have a short window where I can move it around.  To me, nothing is more frustrating than having crooked paper.    


My personal favorite is the Tombow Mono Multi Liquid Glue.   It is a strong adhesive, dries quickly and doesn't wrinkle or warp my paper.   Scrappin With T carries this one too!!


When I do my paper piecings I usually use a combination of Tombow and a Zig Two Way Glue Pen, the fine tip.  The Zig Pen is an EK Success product.  I love the control I have with this pen.  It is perfect for gluing tiny paper pieces.  


Ok after all that, I think it is time for a little give away!!  :)  All you have to do to enter is leave a comment below telling us what your favorite adhesive is and why.  

The winner will receive 2 rolls of our favorite adhesive, Scor Tape!!

I will draw the lucky winner on Friday November 7th!!

Happy Scrap'n Everyone!! 

Leanne